Demystifying Fresh — Build Your own Islands of Interactivity
https://blog.bitsrc.io/demystifying-fresh-building-your-own-islands-of-interactivity-4b774cc30393
The concept of “Islands of interactivity” is a very interesting one, because it poses the premise that the website should only send interactive code to the browser when it’s absolutely needed.
Otherwise, the rest of the HTML should be rendered statically on the server.
This helps speed things up and provides a faster experience for users. But so far, we’ve only seen a few frameworks implement this architecture, Fresh being one of the main ones, but Astro, for example, also has this concept even though they don’t make a lot of noise about it.
In this article I’m going to show you a way to implement this method using Preact, the React-like library with a tiny footprint. I’m also going to be using Express to build the server and something called “importmaps”, which if you haven’t heard about it yet, it’ll blow your mind.
So keep reading!
Understanding Islands
The first thing to understand is that “islands” are nothing more than components that need to be rendered on the client side within the context of a server-side rendered website.
In other words, in a sea of static code, we have an interactive island (see what I did there?).
I’ve written about the islands of interactivity design pattern in the past, so if you want to know more, check it out.
But at this point, all you need to care about, is that we’re going to build a server-side rendered site and inside it, we’ll add a component that because it provides interactivity, will need to be rendered on the client side.
If you think about it like that, it’s not that complicated of a concept, is it?
The problem lies in the fact that splitting these two worlds (the server-side rendered one, and the dynamic one) is not that easy.
The following GIF shows you what we’re going to build:
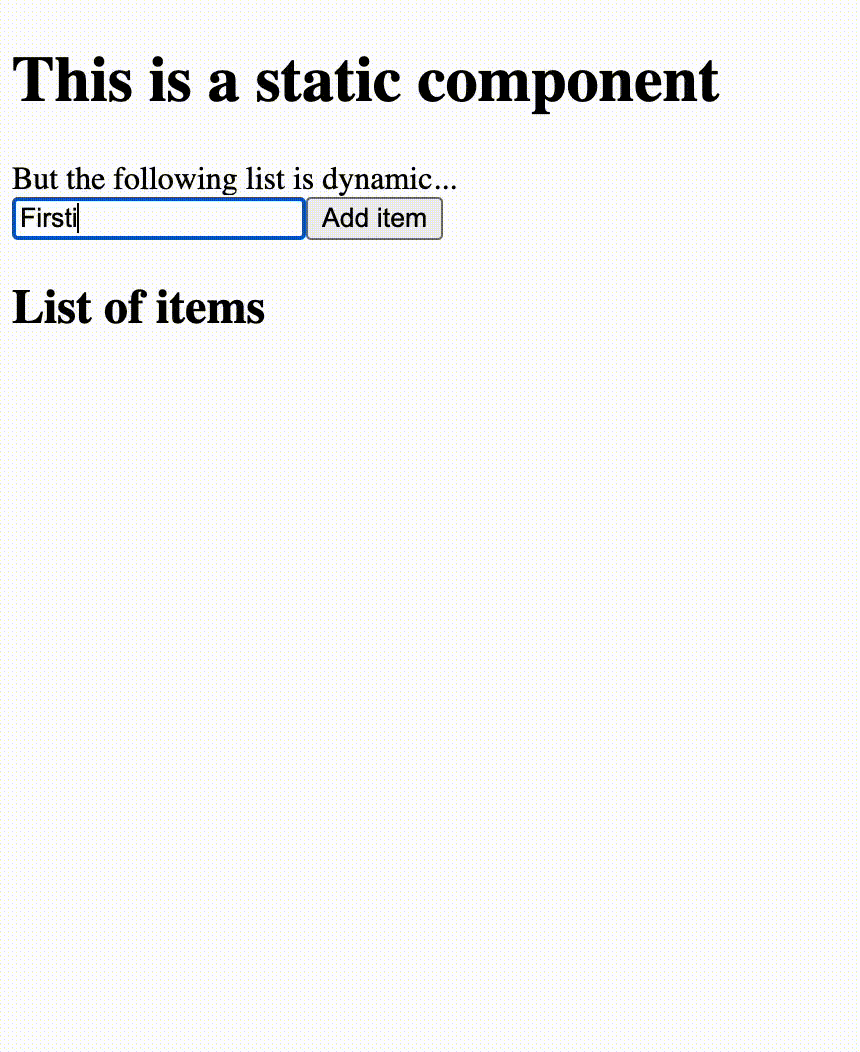
And the following screenshot shows you where the static part ends and where the island begins:
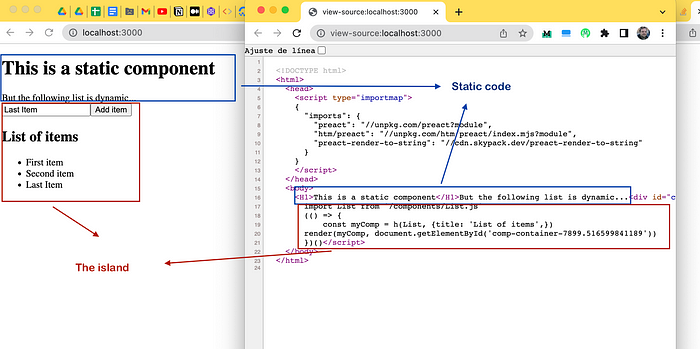
Don’t worry about the code on the island part, we’ll look at it in more detail in a second. The screenshot is to show you that indeed, we have a server-side rendered base site, that adds a bit of JS when required.
Let’s look at the implementation now.
Creating our server-side rendered site
For this task, we’re going to be using Express, since it’s still one of the most popular choices for creating barebone web servers.
This server is going to render the base static template for our site, and it’ll also render the base App component.
For the App component, we’re going to use Preact.
BTW, I’m using Node 19 for this example, and it all works as long as I keep the file extensions under control. This means that our server is actually going to be called server.cjs because it’s going to use require statements:
const express = require("express")
const compression = require("compression")
const render = require("preact-render-to-string")
const { html } = require("htm/preact") // use the provided preact binding

;(async () => {
  const cors = require("cors")
  let App = await import("./components/App.js")

  App = App.default

  const body = render(html` <${App} /> `)

  const app = express() // create the express app
  app.use(cors())
  app.use(compression()) // use gzip for all requests

  // some basic html to show
  const layout = `
  <!DOCTYPE html>
  <html>
    <head>
      <script type="importmap">
      {
        "imports": {
          "preact": "//unpkg.com/preact?module",
          "htm/preact": "//unpkg.com/htm/preact/index.mjs?module",
          "preact-render-to-string": "//cdn.skypack.dev/preact-render-to-string"
        }
      }
      </script>
    </head>
    <body>
      ${body}
    </body>
  </html>
`
  app.use(express.static("src"))

  app.get("/", (request, response) => {
    // listen for requests to the root path
    response.send(layout) // send the HTML string
  })

  app.listen(3000) // listen for requests on port 3000
})()
There are several things to unpack here:
- The server is sending static HTML back on the
/route. - That HTML has a
scripttag of type “importmap”, this map tells the browser where to get these imports from. So I can writeimport {Component} from 'preact'and the browser will know to get this library from"http://unpkg.com/preact?module". And at the same time, the same code works on the server, because I already have Preact installed as a dependency. - That HTML also has the content of the
bodyvariable, which contains HTML. That HTML comes from calling therenderfunction (line 14) from “preact-render-to-string”. This function renders a VNode and returns the HTML as a string. The VNode we’re rendering is the main App component. We can write it like that, because we’re also using thehtmlfunction fromhtm/preactwhich helps us write code that looks very much like JSX and call our components by name (see line 15). - I’m setting the
srcfolder as my static files folder, because I’ll be doingimportstatements in my browser-land JavaScript, and that’s where all my source code files are located (more on this in a minute).
And that’s about it for our server. To summarize, we’re taking the App component and rendering it into a string, which we then concatenate to our main HTML template and return that final string from the server.
As part of that template HTML, we’re sending back an importmap for the browser to know where to get the packages that we reference when we use the import statement (we’ll use those in a minute).
Let’s take a look at our components now.
The main App component
The main application, as I already mentioned, is static, so our component is simply going to print some text out and insert the dynamic one.
import { html } from "htm/preact"
import List from "./List.js"

const PreactApp = () => {
  return html`
    <h1>This is a static component</h1>
    But the following list is dynamic...
    <${List} title="List of items" />
  `
}

export default PreactApp
Once again, I’m making use of the html function to parse my code and make sure I properly render the List component.
The dynamic List component
This one is interesting, because instead of being a functional component, I chose to use a class for it.
Why a class component? Because they allow you to use the lifecycle method and change the way they’re rendered, while I could find a way to do the same thing with functional components (if you know of a way to do this, please share it in the comments, I’d love to know).
import Island from "./Island.js"

class List extends Island {
  constructor() {
    super()
    this.state = { items: [] }
  }

  handleInput() {
    let textField = document.getElementById("enter-text")
    let newItems = [...this.state.items, textField.value]
    this.setState({ items: newItems })
  }

  render(props, state) {
    return this.html`
            <input type="text" id="enter-text" />
            <input type="button" onClick=${this.handleInput.bind(
              this
            )} value="Add item"/>
            <h2>${props.title}</h2>
            <ul>
            <!-- loop over data array -->
            ${this.state.items.map(
              (i) => this.html`
                <li> <!-- render out each item -->
                ${i}
                </li>
            `
            )}
            </ul>
  `
  }
}

export default List
At a first glance, there is nothing too special about this component. It’s your standard class component except for one minor detail (maybe not so minor now that I think about it): I’m not extending Component , instead I’m extending a custom class: Island .
This new class will behave differently if the component is rendered on the back-end (as part of the server-side rendering phase) or if it’s rendered on the browser.
Let’s take a look a the actual star of the show, the Island class.
The behavior of our Island class
This class will make use of one particular lifecycle event method called componentWillMount which gets executed right before the VNode is added to the virtual DOM.
The point is that we can inject code (or logic) before the component gets rendered. So in this case, if the component is being rendered on the back-end, we’ll overwrite its render method to make sure we generate the code needed to hydrate the component.
In other words, this code will take care of importing the actual component, and triggering its rendering phase.
Let’s take a look at the code to understand how we can do that:
import { Component, html } from "htm/preact"

class Island extends Component {
  constructor() {
    super()
    this.html = html
  }

  componentWillMount() {
    if (typeof window != "undefined") return true
    this.renderMethod = this.render
    this.render = this.customRender
    return false
  }
  customRender() {
    let propNames = Object.keys(this.props)
    let compName = this.constructor.name
    let containerID = "comp-container-" + Math.random() * 10000
    return html`
      <div id="${containerID}"></div>
      <script type="module">
        import { h, render } from "preact"
        import List from "/components/${compName}.js"
        ;(() => {
          const myComp = h(${compName}, {
            ${propNames.map(
              (pn) => `${pn}: ${this.propValueToString(this.props[pn])},`
            )},
          })
          render(myComp, document.getElementById("${containerID}"))
        })()
      </script>
    `
  }

  propValueToString(value) {
    if (Array.isArray(value)) {
      return `['${value.join("','")}']`
    }
    if (typeof value == "string") {
      return `'${value}'`
    }
    if (typeof value == "number") {
      return value
    }
  }
}

export default Island
Look at the componentWillMount method (line 11), I’m checking to see if I’m working on the front or on the back. If it’s the latter, then we replace the original render method with a custom one. The new method will write some JS code (see line 21) to import the component, and render it using Preact’s own render function. This code will first run on the back-end because our server is rendering the App component, which as you’ve seen already, is importing and using our List .
The propValueToString method is simply a utility to make sure we properly render the values of our props.
In the case of our sample component, this is the output we get from this method:
<div id="comp-container-7899.516599841189">
</div>
<script type="module">
import {h, render} from 'preact'
import List from '/components/List.js'
(() => {
    const myComp = h(List, {title: 'List of items',})
    render(myComp, document.getElementById('comp-container-7899.516599841189'))
})()</script>
When this code runs on the browser, our List component will be executed again (because I’m importing it and manually rendering it again), but the logic from the componentWillMount will now find that there is a window object, so it won’t overwrite the default render method.
This in turn will cause our dynamic component to be finally rendered and usable on screen.
And that’s all there is to this class.
All you need to build your own island is essentially code that will understand when it’s running on the front and when it’s on the back. If it’s on the back, then generate the code required to load the file from the browser.
If on the other hand, you’re running it from the browser, then the code from before will load the file and trigger its rendering routine.
I used Preact for this example because it’s lightweight and it gave me all the tools I needed to overwrite the default behavior of my island components. If there are other frameworks (probably like React) that give you the same flexibility and control over everything, then I’m sure you’ll be able to port the logic there.